There's so much to tell. I've been away from my blog and just want to tell you why -
I've been trying out Hype 2 software for HTML animation, studying fantasy drawing and cartoon drawing, celebrating Christmas and busyness in the stores, baking, decorating my apartment, and doing gigs on Fiverr.com, and other on-demand sites.
I ordered a few mugs and a tote bag on society6.com. I'm very pleased with the finish and quality. I wish the tote bag was more rugged, and I'd be willing to pay for that, but the quality is good and the price is right, meanwhile. My drawings looked excellent on those products, which I gave for gifts at Christmas.
As always, I'm trying out pastel and charcoal drawing techniques. It's a lot of sketching, that isn't really worth showing. Just for practice. My goal right now is to finish a cat drawing I just made specifically for a comic panel. So this one will be different from others I've shared on society6 products and Fineartamerica, and everywhere else, because it'll serve as a sample of my style to be shared on cartoon forums such as penciljack.com.
During this week between Christmas and New Year's, I hope to settle on fewer, more focused forums and social media for sharing my ideas, art, and services. Fiverr.com is a definite yes; my newly recreated Facebook page is too. I will likely drop instagram and even twitter, in favour of routinely participating on Fineartamerica.com, deviantart.org, penciljack.com, cgsociety.org, and maybe even flicker.com because they offer opportunities for showing work, getting critiques, and getting hired!
Watch for news in the new year.
Happy holidays,
Heidi
Showing posts with label artistic practice. Show all posts
Showing posts with label artistic practice. Show all posts
Saturday, 27 December 2014

Sunday, 7 December 2014
My first HTML5 animation was a success, now visible on Youtube and my website
After some experimenting with the capabilities of Hype 2 on the Mac, I came up with a short animation about Christmas and cats that I have shared on Youtube at http://youtu.be/ITsWH0Rzigc and on my website www.patiostudioproductions.biz. Full audio is only included in the website version, because exporting to video doesn't seem to include audio.
Let me know what you think, there or here in the comments.
Here's the YouTube version, but it's better to see the website version because it utilizes the audio files and original HTML and graphics files.
Now that I know Hype 2 works well, and is very easy to use, I am excited to come up with more compelling stories. I can justify putting time into complete cartoon or line art illustrations, with suitable components to be animated with HTML5 and Javascript. For my samples, I am planning to make a few educational and entertainment pieces. My college and university studies offer lots of enjoyable subjects to choose from, that I'll try to show in a funny or unique (but compelling) way. For entertainment, I have a few cartoon characters that I draw frequently and would love to portray in animated stories. Not to mention promotional animations for my own and others' websites.
It's exciting, especially after I decided Madefire's online animated comic book creation tool seemed to have an unnecessarily dark and mysterious learning curve. My project there failed three times, and I say that's the end of that!
Madefire out...Hype 2 in. Plus, Hype 2 creates HTML5 assets ready for FTP upload. I've never used an FTP client before, but on short notice, and strong desire to show off my Christmas cat and tree animation, I figured it out (using FileZilla) and it worked perfectly. The first and only thing you'll see on my 'practice' website space (www.patiostudioproductions.biz) is that cat and tree animation!
Let me know what you think, there or here in the comments.
Here's the YouTube version, but it's better to see the website version because it utilizes the audio files and original HTML and graphics files.
Now that I know Hype 2 works well, and is very easy to use, I am excited to come up with more compelling stories. I can justify putting time into complete cartoon or line art illustrations, with suitable components to be animated with HTML5 and Javascript. For my samples, I am planning to make a few educational and entertainment pieces. My college and university studies offer lots of enjoyable subjects to choose from, that I'll try to show in a funny or unique (but compelling) way. For entertainment, I have a few cartoon characters that I draw frequently and would love to portray in animated stories. Not to mention promotional animations for my own and others' websites.
It's exciting, especially after I decided Madefire's online animated comic book creation tool seemed to have an unnecessarily dark and mysterious learning curve. My project there failed three times, and I say that's the end of that!
Madefire out...Hype 2 in. Plus, Hype 2 creates HTML5 assets ready for FTP upload. I've never used an FTP client before, but on short notice, and strong desire to show off my Christmas cat and tree animation, I figured it out (using FileZilla) and it worked perfectly. The first and only thing you'll see on my 'practice' website space (www.patiostudioproductions.biz) is that cat and tree animation!
Monday, 24 November 2014
Educational video graphics sample in progress
It's already been a few weeks since I studied an intense intro to motion graphics. I gathered some footage to practice with and decided on an educational roadside ecology lesson, that takes me back to college when I learned a lot about Garry Oak trees.
This project ate up my time today, in addition to going for a long walk in Swan Lake park that resulted in getting drenched during a moderate rain spell.
It's about 10:00pm and I'm still a bit damp feeling from that walk, while I work on my Garry Oak video clips.
I'm busily creating new samples of my recent interests like animation and motion graphics. This video may not need motion elements, because it's already filled with short segments of different features of trees, and I'm not adding any cartoon characters...or maybe I should!
It's all good practice. Adding and/or animating elements in a video, such as text overlays, requires a sense of timing and generally a sense of usefulness. I've decided that the audience for this sample video is 10-12 year olds. I don't have quick and easy access to lots of terminology about ecological and biological features of trees; college was a long time ago and I don't remember the specifics.
A little animation may draw attention, without overpowering or dominating the visuals of the trees themselves. I'm most interested in practicing with the pen and brush tools to see if I can produce a line that connects the terms to the tree in an animated fashion.
Luckily, with practice, the techniques I learned in the tutorial (off lynda.com) are getting easier and more precise, and they tie in nicely to basic graphic design principles I've also studied in the past, which keep me from going overboard with animation (hopefully).
I'm sure you readers will let me know if anything looks wrong!
Monday, 17 November 2014
Some screen shots from the action while making animated characters the past few days
I've uploaded the samples of a few recent simple character animations to YouTube, and wanted to show off some screen shots too, so you know what the Toon Boom interface is like. Some conversations online make it difficult to choose among Toon Boom Studio and products like Flash and Anime Studio Debut. I personally didn't like Anime Studio, and have never used Flash so I can't comment on any comparison yet.
Here's a hint at what working with Toon Boom Studio animation software is like. First, a character with bones and "zones of influence":
A character following a "motion path":
Adjusting with cut-out animation tool:
And some screen shots of the interface while working with my stick figure:
Here's a hint at what working with Toon Boom Studio animation software is like. First, a character with bones and "zones of influence":
A character following a "motion path":
Adjusting with cut-out animation tool:
And some screen shots of the interface while working with my stick figure:
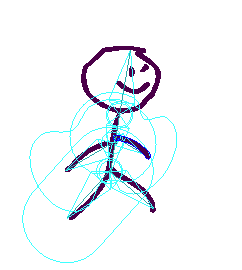 |
| 'Zones of influence' for bones are visible; not sure what they do yet! |
 |
| Leg 'bone' selected and can be rotated about the hip attachment point |
 |
| Motion path with keyframes along the line spanning 5 seconds, at 12frames/sec |
 |
| Timeline shows several layers are created to enable motion of each limb |
The tricky part of using sophisticated animation software, it seems, is to use the right tool for each task, and select the right layer and timeline position every time, before making an adjustment. One suggestion to Toon Boom already: make icons bigger!!! It's very difficult to tell which view is selected, between Drawing View, Camera View, and the side & top views.
Busy with a variety of artistic media
It's hard to choose some days. I always start with at least two goals for the day, such as finishing a painting and doing a digital painting exercise. Any gigs I get off fiverr.com are done in addition to that, because I have a high drive for learning newer, better techniques than I learned way back in high school and days off during a long period of work and studies.
Last week, I decided to focus a little, however, and I set aside many drawing goals (ie. life drawing studies) so that I could try out some animation, motion graphics, and video compositing techniques I found tutorials for. I ended up downloading an animation software demo that lasts 15 days - Toon Boom Studio.
I've also completed a study in motion graphics that went from basic motion tricks to creating animated logos in Photoshop. I went on just in the past few days, to try to figure out how to add masks to videos, so that people can be highlighted or cropped out for example, even when they are moving around in the frame. Clearly, there's lots to be covered in my bag of interests.
So far a single activity hasn't popped out as 'the one' that I'll prioritize in my personal and commercial pursuits. In the past few days, my animated stick man has gotten more sophisticated, and so has my video masking. Meanwhile, all of those activities require keeping my drawing skills keen. Thus, tonight I set aside most of the computer activities and started a simple watercolour painting exercise using my favourite subject, cats, to try out some quick colour decisions and glazing techniques.
I just wanted to write to keep you interested, and know that I'm not falling off the radar. I have taken a bunch of photos and computer screenshots and need to sit down, organize them, and post them with useful stories about work in progress and my reviews of techniques I've learned recently.
Also, one drawing has been chosen to appear in a group show at Pandora Arts Collective later in November. It's the Forest Kitty ink drawing I previously blogged about. I'm excited about that, and to see the work of my drop-in art group peers on display together.
Happy graphics/video/animation/painting everyone!
Last week, I decided to focus a little, however, and I set aside many drawing goals (ie. life drawing studies) so that I could try out some animation, motion graphics, and video compositing techniques I found tutorials for. I ended up downloading an animation software demo that lasts 15 days - Toon Boom Studio.
I've also completed a study in motion graphics that went from basic motion tricks to creating animated logos in Photoshop. I went on just in the past few days, to try to figure out how to add masks to videos, so that people can be highlighted or cropped out for example, even when they are moving around in the frame. Clearly, there's lots to be covered in my bag of interests.
So far a single activity hasn't popped out as 'the one' that I'll prioritize in my personal and commercial pursuits. In the past few days, my animated stick man has gotten more sophisticated, and so has my video masking. Meanwhile, all of those activities require keeping my drawing skills keen. Thus, tonight I set aside most of the computer activities and started a simple watercolour painting exercise using my favourite subject, cats, to try out some quick colour decisions and glazing techniques.
I just wanted to write to keep you interested, and know that I'm not falling off the radar. I have taken a bunch of photos and computer screenshots and need to sit down, organize them, and post them with useful stories about work in progress and my reviews of techniques I've learned recently.
Also, one drawing has been chosen to appear in a group show at Pandora Arts Collective later in November. It's the Forest Kitty ink drawing I previously blogged about. I'm excited about that, and to see the work of my drop-in art group peers on display together.
Happy graphics/video/animation/painting everyone!
Saturday, 1 November 2014
Working on a cartoon skiing watercolour today with Aquarelle paper
It's my first time using Aquarelle watercolour paper. Right now I'm just waiting for an initial blocking of colour to dry. It's my cartoon character Fuzz in a ski scene.
My last few drawings were ink, and even though I just bought a few more ink colours to make tints and shadows easier to complete, I feel compelled today to revisit my interest in watercolours. Depending how the painting turns out, I may add some illustration using ink as well, but ideally I will control the paint enough with several washes to make my cartoon character pop out of the scene.
It's an action scene, just like I used to draw as a teen, and in college too I recall. This is my most-frequently-doodled character in my school notebooks. He doesn't look like a stunning dude so far, but let's hope my watercolour skills give him some stature by the end of this painting exercise!
Notice the painting support is my trusty Sterlite plastic bin lid. Works every time, and protects my work table that also serves as my fine dining table.
My last few drawings were ink, and even though I just bought a few more ink colours to make tints and shadows easier to complete, I feel compelled today to revisit my interest in watercolours. Depending how the painting turns out, I may add some illustration using ink as well, but ideally I will control the paint enough with several washes to make my cartoon character pop out of the scene.
It's an action scene, just like I used to draw as a teen, and in college too I recall. This is my most-frequently-doodled character in my school notebooks. He doesn't look like a stunning dude so far, but let's hope my watercolour skills give him some stature by the end of this painting exercise!
 |
| Fuzz Skier watercolour in progress |
Monday, 27 October 2014
New ink and pastel image done: You're Watching?
I've been busy organizing my website and learning some new HTML skills the past few weeks. Normally, I would like to post on my blog more frequently.
New cat drawing: You're Watching?
 |
| You're Watching? by Heidi Bada |
So this drawing was done with some self-imposed pressure. Also I was a little unhappy with recent efforts at drawing the image in my head of a cat being interrupted while cleaning its paw.
Here it is, in pastel and ink. I think this time I captured the eye properly, to show that she is perturbed while being watched.
Prints will be available soon from my FineArtAmerica and Society6 galleries. Of course, this original is for sale too!
Website Project
Now the other thing I've been working on, the standalone website, started out as a venue to show off my HTML skills. However, it quickly became a goal for me to show off my illustrations in a comic book format. Then it was not so much comics necessarily, but just any storytelling goal using a website and modern HTML and companion tools.
I'm now taking a different direction with my website project, studying successful websites and figuring out what makes a good story in websites. I don't have anything up and running on my website to share yet, but rest assured this blog will be plastered with it when I've got at least a few illustrations in place.
My goal is to use ordinary webspace to demonstrate illustration as a storytelling tool, in both animated and static forms. Could be for entertainment, but more likely advertising and product demonstration. I love working with video as well, so the trio of illustration, animation, and video combined in a webspace creates a fun environment for me to work in. I'll want to create the images and the interaction/animation functions for custom projects, ideally.
It turned out that self-directed comic book sharing on comic book sites is a difficult way to get noticed and get feedback I need, regarding engagement of viewers and the qualities of my characters and storylines.
Using a website of my own, I can at least share my work, get more HTML experience, and get direct feedback from friends and fans.
My animation style was originally inspired by some Madefire comics I found using my iPad in the app store. I like how animation is minimal, and simply enhances the storyline (usually).
There you have it: a commercial application of illustration that is quite exciting and delightfully unpredictable as technology changes. Sounds good to me.
Saturday, 27 September 2014
Progress on kitty painting...now it has a background in progress
Here's my Prissy Kitty digital painting so far, with a background started today. I'm following the basic steps in a tutorial on building up a 3-dimensional cartoon-like image.
I had been working on this image bit by bit, while learning to use Corel Painter AND my Wacom tablet. This tutorial was perfect for developing my image properly in terms of digital painting steps. I like the image in my head so much, that I'm being quite tedious in my process.
I went too far into my shading and highlighting earlier, trying to establish some depth to the character, before I found this tutorial. Depth can be established by painting, like in real life, with tints and shades of colours. That is was I initially did here. I also tried some dodge and burn tools that other tutorials suggested, after laying down a relatively flat colour to work with. It's useful to get practice in both.
And thanks to the Corel Painter Getting Started Guide I mentioned in my last post, I'm finding tools faster and more reliably already! And with only an hour of practice so far.
This tutorial starts out with blocked-in colours (in Photoshop I believe) then lighting effects, then details. The background is dealt with fairly late in the process, which suits this image similarly to the example shown in the tutorial. We'll see how it plays out in Painter and my kitty drawing. I'm still intending to have a leering glance on her, being interrupted by an admiring passerby looking at her shiny and clean coat of fur.
 |
| This image feels like it's on track thanks to tutorial |
I went too far into my shading and highlighting earlier, trying to establish some depth to the character, before I found this tutorial. Depth can be established by painting, like in real life, with tints and shades of colours. That is was I initially did here. I also tried some dodge and burn tools that other tutorials suggested, after laying down a relatively flat colour to work with. It's useful to get practice in both.
And thanks to the Corel Painter Getting Started Guide I mentioned in my last post, I'm finding tools faster and more reliably already! And with only an hour of practice so far.
This tutorial starts out with blocked-in colours (in Photoshop I believe) then lighting effects, then details. The background is dealt with fairly late in the process, which suits this image similarly to the example shown in the tutorial. We'll see how it plays out in Painter and my kitty drawing. I'm still intending to have a leering glance on her, being interrupted by an admiring passerby looking at her shiny and clean coat of fur.
Friday, 26 September 2014
Latest drawing - this one's a creepy, crawly figure
Here's a quick shot of a drawing exercise today, turned watercolour painting:
The exercise instructed me to start with a stick figure, which I took as an opportunity to draw an unfortunately weary human form. Then add mass, and colour, with light and shadow.
I didn't get so far as adding light and shadow specifically, but I did add an ominous tornado-like dark force at left, creeping up behind the poor traveller. Oddly enough, he seems to be heading into the light.
The paper was quite wet upon finishing, and I added some sprinkles of salt to try out the technique of using salt to add a textured look to watercolour washes. I sprinkled three areas - both of the red patches of background, plus the blue tornado element. I suspect the blue was nearly dry, as the salt had little, if any effect.
Note that my teen drawing was often creepy like this - some deformation but still recognizably human. This drawing takes anatomy more seriously though, to coincide with the thorough discussion of anatomy in the drawing books I've read recently.
This time, instead of starting with the feet, I started with the head; I really wanted the figure to not be completely in profile, and here he is turning away slightly so we see the back of his head and just a hint of an eye and nose. Then the basic pelvic shape, then the legs hanging off awkwardly, with dainty slow steps beneath.
I think he looks stable on his feet, but that crazy life-adjusted back curve tells a story that this person is not the same man he was years ago...although it still was just a drawing practice exercise!
Also note that his feet are able to articulate. I wonder if I drew that so prominently, at a time when I've broken some toes in my foot and can't make that shape with my own foot (yet?) !
This exercise reminds me that I love to make drawings of figures doing things. Sports is ideal for me, and I've done lots of that in past (not recently). And I also have fun using my imagination to create unlikely or unlikeable situations for the characters. Or maybe exciting and positive situations too. We'll see what happens at my next practice session, I guess!
 |
| Cellphone snapshot of a drawing today |
I didn't get so far as adding light and shadow specifically, but I did add an ominous tornado-like dark force at left, creeping up behind the poor traveller. Oddly enough, he seems to be heading into the light.
The paper was quite wet upon finishing, and I added some sprinkles of salt to try out the technique of using salt to add a textured look to watercolour washes. I sprinkled three areas - both of the red patches of background, plus the blue tornado element. I suspect the blue was nearly dry, as the salt had little, if any effect.
Note that my teen drawing was often creepy like this - some deformation but still recognizably human. This drawing takes anatomy more seriously though, to coincide with the thorough discussion of anatomy in the drawing books I've read recently.
This time, instead of starting with the feet, I started with the head; I really wanted the figure to not be completely in profile, and here he is turning away slightly so we see the back of his head and just a hint of an eye and nose. Then the basic pelvic shape, then the legs hanging off awkwardly, with dainty slow steps beneath.
I think he looks stable on his feet, but that crazy life-adjusted back curve tells a story that this person is not the same man he was years ago...although it still was just a drawing practice exercise!
Also note that his feet are able to articulate. I wonder if I drew that so prominently, at a time when I've broken some toes in my foot and can't make that shape with my own foot (yet?) !
This exercise reminds me that I love to make drawings of figures doing things. Sports is ideal for me, and I've done lots of that in past (not recently). And I also have fun using my imagination to create unlikely or unlikeable situations for the characters. Or maybe exciting and positive situations too. We'll see what happens at my next practice session, I guess!
Tuesday, 23 September 2014
Prissy Kitty coming along, even though I was busy doing a few freelance gigs today
Fiverr.com is keeping me really busy with app reviews. I love that computer geeky stuff, too, but I felt a little weird the past few days to not have much time to work on drawings.
So tonight at 11:00pm I blocked out a little time and no pressure to make a little progress on my sleek cat drawing idea that I started recently.
I feel good that I made some progress. I still need to define in my mind how elongated I want her to be, and what kind of muscle tone I want to portray. I'm definitely leaning towards the clay sculpture look that I love so much.
This pen grip doesn't always work with the graphics tablet, and works a lot better if you tilt the tablet so that the pen is making adequate contact at an angle. It effectively makes you notice how your whole arm is moving, rather than just your wrist. I prefer to not rely on my wrist, as I'm looking for soft, sweeping movements of course for my kitties.
I don't see any discussion online so far in my travels about how to transition from traditional drawing methods to a drawing tablet. I don't really want to give up my spontaneous and freely-moving arm gestures; a lot of comments online about Wacom tablets indicate the users are adopting a handwriting grip when using the pen.
I'd love to hear opinions on how people hold their drawing tools, whether pen, pencil, brush, or digital tools. Even my drawing books don't address this much, except for the one I'm currently reading. It's called Drawing Basics and Video Game Art by Solarski and it goes into some good detail about how to hold a pencil in various ways for drawing.
So tonight at 11:00pm I blocked out a little time and no pressure to make a little progress on my sleek cat drawing idea that I started recently.
 |
| Cat looking a little more colourful after 20 min |
Thoughts about transitioning from traditional to tablet drawing
While working with Corel Painter for this drawing this evening, I discovered a pastel drawing tool that feels very much like traditional Pan Pastel. It was Real Soft Pastel brush. I managed to get a real soft imprint as though I was using a sponge with Pan Pastels, especially when holding the pen in an overhand grip.This pen grip doesn't always work with the graphics tablet, and works a lot better if you tilt the tablet so that the pen is making adequate contact at an angle. It effectively makes you notice how your whole arm is moving, rather than just your wrist. I prefer to not rely on my wrist, as I'm looking for soft, sweeping movements of course for my kitties.
I don't see any discussion online so far in my travels about how to transition from traditional drawing methods to a drawing tablet. I don't really want to give up my spontaneous and freely-moving arm gestures; a lot of comments online about Wacom tablets indicate the users are adopting a handwriting grip when using the pen.
I'd love to hear opinions on how people hold their drawing tools, whether pen, pencil, brush, or digital tools. Even my drawing books don't address this much, except for the one I'm currently reading. It's called Drawing Basics and Video Game Art by Solarski and it goes into some good detail about how to hold a pencil in various ways for drawing.
Saturday, 20 September 2014
Where will I start with using my new Wacom tablet for digital drawing and painting?
I've been asking myself that since I bought my Wacom digitizing tablet a few days ago. It's not an easy answer. The product doesn't come with a manual, no surprise, but it also doesn't have anything to help a traditional artist or a Photoshop photo editing specialist adapt to this new tool.
Do I redo my drawing and painting skills using the tablet instead of pen or brush?
Do I open a blank window and press the buttons and move the pen around to see what it does?
Or do I try out the Corel Painter X3 trial app that came with the device - hoping that Corel has created a digital drawing tutorial to learn the tablet's features, and digital painting in general?
* note: several other drawing apps come with the device, but Painter is the only one I'm familiar with
Or hope and pray for help on YouTube?
Being the type of person who just likes to jump in and do something, rather than search online for an answer to a specific but obscure question, I make a short plan:
To my delight, it offers a learning module full of instructional videos. Many cover how to work with brushes in the app, and some videos cover full image creation examples. Non-video written tutorials are also available for those artists who prefer to work with step-by-step instructions. I clicked on Digital Art.
After viewing a few videos, I was still only working with basic strokes, and still didn't know how I'm supposed to hold the stylus, or what the buttons do when actively painting. Note - the System Settings app in a Mac computer creates a Wacom category when the device is installed, and it lets you program the buttons and set up your usage preferences.
Continuing with the Intuos category, I found two tutorials that go beyond the installation process. One is for working with "radial menus" and the other is about configuring buttons and preferences. Finally I found answers to some of my curiosity about how the features work! I mean, I saw quickly that the buttons can be programmed, but without experience using buttons in conjunction with a drawing tablet...well let's just say the information didn't register as to how I might want to program my buttons and radial menu. A nice feature is that by default, the second "express button" down brings up a diagram of the buttons and stylus, and clicking on any part brings up the appropriate settings from the Settings-->Wacom Tablet module on my Mac.
*note - the tablet needs to be turned on (it isn't automatically on when using without cord) in order for Settings --> Wacom Tablet to open.
Good to know: 1) settings can be recorded for different apps, 2) the second button down on the tablet brings up a reminder of all the current settings for all the buttons
So there you go...I feel much better prepared for Painter, and I'll create some real pictures using my tablet with techniques learned in the Bold Visions digital painting book I found at the library.
I started with no particular image in mind, just a cats theme and a textured pastel paper with a lavender tint.
I instinctively started outlining a cat with a pastel tool...then I remembered I'm not just sketching. I started over with the idea of blocking in shapes as an underpainting, still using a pastel:

I continued to work at adding colour glazes (influenced by recent studies in pastel) and edging. By now I was holding the tablet at a 30-45 degree angle with one hand, and drawing with a relaxed and loose grip (learned from drawing tutorials) with my dominant hand. Since learning to NOT draw with a handwriting pose, my drawing surface needs to be angled, including my tablet. It's proven to be effective for controlling my mark-making strokes. I'm certain that the classic handwriting pen posture was developed so we could colour inside the lines. No need for that here.
I'm having lots of fun using the tablet, as I would with tradition in-hand drawing tools. The ability to choose unlimited colours in my apps is invaluable, by the way. The colour picker is oriented around a colour wheel with tints and tones displayed in the centre, which is convenient. I wouldn't say that drawing on the computer is any quicker than traditional media. The colours and lack of dust are two positives, and when doing watercolours, I hear that Painter allows 'drying' the paper which is sometimes a pain when using real paint.
Here's some edging now on a new layer, in Gel blend mode.
I haven't tried to smudge my pastels yet. It turns out Corel Painter includes a variety of Blender tools that smudge the strokes.
I've gone a bit farther ahead to do some detail in the eyes and nose, to get the shapes started in that area, so I can get onto shadows and light sources for the purposes of demonstrating the tasks I typically would do with a digital painting project. They eyes and nose layer is Default blend mode.
Next I tried to do some quick lighting and shading. I want to add highlight to the shoulder and under chin to use up some of the excessive facial region and body that I blocked out earlier.
In the process, I also added as much detail as I intended. Here is the final result:
There you have it. A completed digital pastel drawing. Didn't cost me a penny, other than buying the drawing tablet. I started to enjoy using the device nearing the end. Using blend modes and adjusting opacity is a great digital feature in Photoshop or Painter, and opens up new kinds of images I can make. So I shall keep busy practicing my drawing and pastels, while also studying digital art and using my imagination to apply these modern tools appropriately for goals.
Do I redo my drawing and painting skills using the tablet instead of pen or brush?
Do I open a blank window and press the buttons and move the pen around to see what it does?
Or do I try out the Corel Painter X3 trial app that came with the device - hoping that Corel has created a digital drawing tutorial to learn the tablet's features, and digital painting in general?
* note: several other drawing apps come with the device, but Painter is the only one I'm familiar with
Or hope and pray for help on YouTube?
Being the type of person who just likes to jump in and do something, rather than search online for an answer to a specific but obscure question, I make a short plan:
- Open Corel Painter and follow any tutorials it offers using my Wacom tablet where possible
- Try Wacom website (again) to seek instructional videos on using the hardware properly - during installation, videos offered gave me no instructions on what its buttons do, and I didn't feel inspired to search YouTube for other videos at that point
- Use Painter while working through a book I just studied at library: Bold Visions, oriented towards digital painting
The results follow!
I spent the whole afternoon getting a good feel for the device, and Painter to boot. All I knew about Painter at the start, is that it is the best app for simulating watercolour painting, and I love that idea!
I just finished doing a thorough practice using the book Bold Visions, and it works with environments, lighting, forms, shadow, and many examples of working from sketch to forms to details. This exercise gave me an opportunity to work with the copious notes I made.
In Corel Painter and Corel.com
 |
| Starting point for learning more about Corel Painter |
After viewing a few videos, I was still only working with basic strokes, and still didn't know how I'm supposed to hold the stylus, or what the buttons do when actively painting. Note - the System Settings app in a Mac computer creates a Wacom category when the device is installed, and it lets you program the buttons and set up your usage preferences.
In Wacom.com
Here I found a different pathway to find tutorials. At the main wacom.com website, I hit the ? icon to get Support. Then Product Tutorials. There I chose my model (Intuos Pro) and also saw a Webinars tab that turned out to offer Painter and other painting tutorials that apply to any tablet. |
| Tutorials organized by Wacom product families, plus webinars |
*note - the tablet needs to be turned on (it isn't automatically on when using without cord) in order for Settings --> Wacom Tablet to open.
Good to know: 1) settings can be recorded for different apps, 2) the second button down on the tablet brings up a reminder of all the current settings for all the buttons
So there you go...I feel much better prepared for Painter, and I'll create some real pictures using my tablet with techniques learned in the Bold Visions digital painting book I found at the library.
Using Bold Visions techniques
The overall technique is probably the same any artist would learn in art school - rough in shapes, add tone to establish depth and three-dimensionality, and finally add details. The procedure using something like Photoshop or Painter requires several layers ideally, to get the best control of the digital canvas.I started with no particular image in mind, just a cats theme and a textured pastel paper with a lavender tint.
I instinctively started outlining a cat with a pastel tool...then I remembered I'm not just sketching. I started over with the idea of blocking in shapes as an underpainting, still using a pastel:
I continued to work at adding colour glazes (influenced by recent studies in pastel) and edging. By now I was holding the tablet at a 30-45 degree angle with one hand, and drawing with a relaxed and loose grip (learned from drawing tutorials) with my dominant hand. Since learning to NOT draw with a handwriting pose, my drawing surface needs to be angled, including my tablet. It's proven to be effective for controlling my mark-making strokes. I'm certain that the classic handwriting pen posture was developed so we could colour inside the lines. No need for that here.
I'm having lots of fun using the tablet, as I would with tradition in-hand drawing tools. The ability to choose unlimited colours in my apps is invaluable, by the way. The colour picker is oriented around a colour wheel with tints and tones displayed in the centre, which is convenient. I wouldn't say that drawing on the computer is any quicker than traditional media. The colours and lack of dust are two positives, and when doing watercolours, I hear that Painter allows 'drying' the paper which is sometimes a pain when using real paint.
Here's some edging now on a new layer, in Gel blend mode.
 |
| More form and some edging |
I haven't tried to smudge my pastels yet. It turns out Corel Painter includes a variety of Blender tools that smudge the strokes.
I've gone a bit farther ahead to do some detail in the eyes and nose, to get the shapes started in that area, so I can get onto shadows and light sources for the purposes of demonstrating the tasks I typically would do with a digital painting project. They eyes and nose layer is Default blend mode.
 |
| Closeup of eyes and nose beginnings |
In the process, I also added as much detail as I intended. Here is the final result:
 |
| Final cat by Heidi Bada |
Thursday, 18 September 2014
Cartoon characters from my high school notebooks made fresh from memory
A couple decades ago, my notebooks in school were filled with doodles. One particular character appeared frequently. As I'm trying to perfect my watercolour, pastel, and digital painting techniques, I thought drawing this little character anew was a useful exercise.
Knowing that the character itself is etched in my memory, I plan to create several versions, different variations and poses, and some storylines of activities or interactions he gets into. There's also a she version in my mind.
My initial results with watercolour follow.
Knowing that the character itself is etched in my memory, I plan to create several versions, different variations and poses, and some storylines of activities or interactions he gets into. There's also a she version in my mind.
My initial results with watercolour follow.
 |
| Fuzz character with smirk by Heidi Bada |
 |
| Baby version of fuzz character |
Thursday, 11 September 2014
Explored an art group in Victoria today: Pandora Arts Collective in Fernwood
On a spur-of-the-moment enthusiasm urged by an email from a friend, I decided to check out Pandora Arts Collective today. My friend had told me about a number of events and groups in the area, and I was familiar with this one's location and impressed by their pro-art website.
I was greeted with warm smiles and a thorough orientation. The studio is wide open space with tables to draw, paint, and do crafts. I believe easels are also available if needed. The drop-in fee is obviously very reasonable at $2, and I had a pleasant and productive time!
The mix of eight or so artists included an artist-in-residence interested in animation, a painter, a jewelry duo, and a few pastel and pencil illustrators. I think I made 8 new friends today! It was fun, and I didn't know what to expect, at $2 a session, so I only brought a sketchbook and pencils.
I see now that the place and the people are suitable for doing any combination of serious, fun, collaborative, and therapeutic art.
The reason I'm sharing this is to encourage people to visit their local community groups and even venture out of their usual circles to meet new artists. I was encouraged to keep working at my confident skills, and indirectly try new things, too.
Sounds like a very good deal, eh?
I was greeted with warm smiles and a thorough orientation. The studio is wide open space with tables to draw, paint, and do crafts. I believe easels are also available if needed. The drop-in fee is obviously very reasonable at $2, and I had a pleasant and productive time!
The mix of eight or so artists included an artist-in-residence interested in animation, a painter, a jewelry duo, and a few pastel and pencil illustrators. I think I made 8 new friends today! It was fun, and I didn't know what to expect, at $2 a session, so I only brought a sketchbook and pencils.
I see now that the place and the people are suitable for doing any combination of serious, fun, collaborative, and therapeutic art.
The reason I'm sharing this is to encourage people to visit their local community groups and even venture out of their usual circles to meet new artists. I was encouraged to keep working at my confident skills, and indirectly try new things, too.
Sounds like a very good deal, eh?
Subscribe to:
Posts (Atom)